czwartek, 30 sierpnia 2018

Panzerpahwagen BA 64(r), 1/35, MiniArt 35110, Part 5

Hello folks.
Getting fast to the end. Here's the last update on the project before the final reveal. Let's get to it.

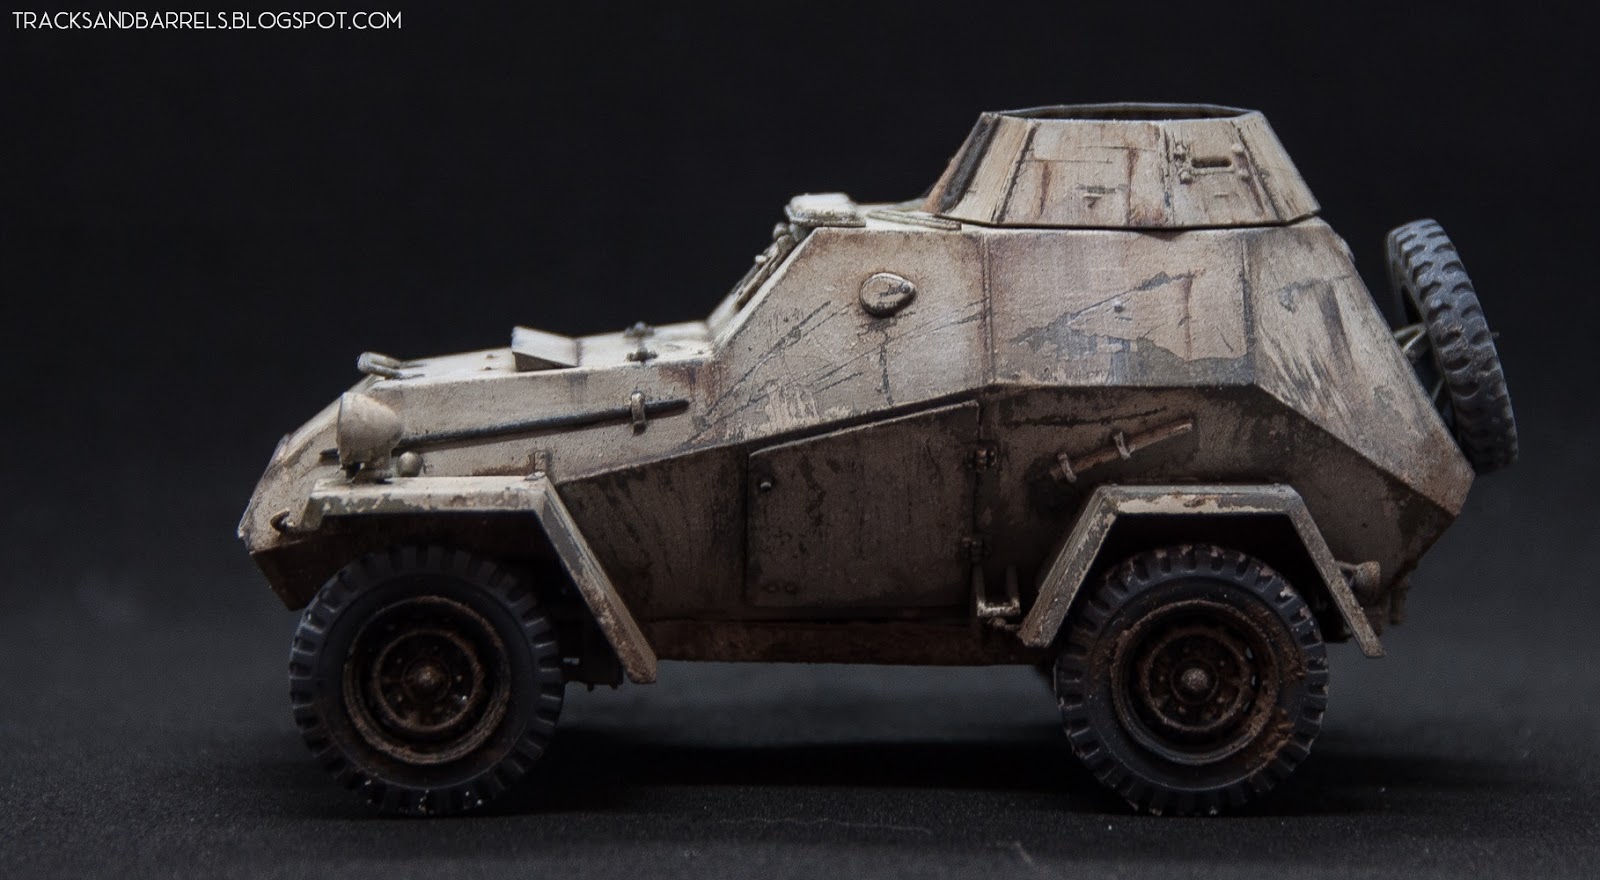
 Pretty much all the washes and basic weathering is done.
 Washes come fom Mig pallette. I used dark brown one, designed for DAK purposes, I think.
 But it also works here, giving me nice contrast.
 Spare wheel attached.
 I also did all the equipment attached to the vehicle.
 After washes it was time for streaks and general altering colors.
 I did stick to the brown pallette as it feels as good choice.
 Next step was add some white spots, to emphasize the depth of color scheme.
 I did that with some white streaks and sprinkles.
 Then I bought the black background.
 Surely, the pictures look more distinguished now.
 Some more subtle weathering, this time with light gray pallette.
 Mainly oil paints.
 I tried to do one section at a time to avoid symetrical doings.
 When it comes to armour modelling, assymetry is your best friend.
 I really like the way this model looks.
 It is very small vehicle, but it can look effective.
 Also, did some rusty pigments on the exhaust,
 OK - time to put wheels on.
 And this is how it looks, standing on his own "legs".
 Attaching wheels was tricky as the holes in them were too big.
 I had to make some arangements to make them fit.
 But it did work, and finally I attached them
 It looks like the end is very, very near.
 Just the gun and the base.
 And, of course, our german soldier.
Thanks for watching. Stay tuned for final reveal.
Cheers
D.

czwartek, 23 sierpnia 2018

Panzerpahwagen BA 64(r), 1/35, MiniArt 35110, Part 4

Hello lads.
Long time no see. It is summer and my modelling activities are reduced to a minimum. I did manage to process with some photos. The model itself is pretty much ready. I just need to work on photos. I hope it will go swiftly and I will be able to present final post in coming days.
Enough talk - let's get done with it.

 OK, first of all I put some filler where it needed to be put.

That would the final composition. It's not great - it is modest but it is my first time with a figure. I hope I won't ruin everything.

With everything glued together it was time to roll out the paints. First, it was the layer of dark grey.

It is a Tamiya paint. Over the course of last few models I decided that this band works the best for me. It is most reliable paint. Never had problems with those - encountered lots of trouble with other brands.

On top of I put a rather generous layer of hairspray.

After that - the Dunkelgelb.

Then I did some scratches with a brush dipped in fresh water.

I really like this technique. It certainly gives the most realistic result.

 Next step: some more hairspray.

I use the cheapest hairspray I found in a supermarket.

 After that I put some white colour. And of course - scratching. Next step was Wash.

 I used dark brown wash from Mig Productions.

I also did put some details on like the saw or an axe.

I really like the way dark wash composes with the white and Dunkelgelb.

And - the time has come for out little dude.

It took me several hours to finish the lad. I don't have any pictures from processing due to camera problems. But it's pretty much straight forward. All the paints were Tamiya's. Boots were leather brown, overalls were white, and some flesh tones on the skin. The hat was painted black. After that I put some washes on and here's the final result I hope you like it.

OK That would be it for now. See you soon (really soon, I hope).q

D.