Hello. New project on the way. MiniArt's BA 64(r). That's a really little vehicle, so it shouldn't take long to build. Altho', as my "something" new thing, I am going to build a little snowy base for the vehicle, and a figure - one of those which are in the MiniArt's box. Here's the first part:
A little of "what's inside of the box".
Lower and upper hull.
Chassis parts.
Couple of winter Krauts.
Turret and other pieces.
Aaaaand the tyres.
I started with the chassis.
Next thing was the gearbox. Weird thing - there is no engine at all.
I wonder if the gap would be seeable.
Especially from below.
More details on.
The fitting is really good.
Looks like most of the interior is done...
...so I started with Helmut.
That is it for now, folks. Next post: third project I started. A plane. Stay tuned.
Thanks for watching.
środa, 28 lutego 2018
poniedziałek, 22 stycznia 2018
U.S. 6X6 Cargo Truck M561 Gama Goat, 1/35, Tamiya 35330, Part 1
Hello lads. Long time no see. Now, it doesn't mean that nothing happened in my modelling world. Not at all, cause it did. I started three new projects (two 1/35 and one 1/48th scale). This is the first of them. It's Tamiya's Gama Goat (35550). I bought it long time ago, cause its shape appealed to me. Rather clumsy looking vehicle. Great little truck to build.
In my previous project I mentioned that in each new model I want to try something new. Something that I've never done before. Or something I already have, but this time I can try it in a different way. For this I decided that I am going to do some scratchbuilding. I mean adding some parts that are not in a model or PE set. Some wiring or hydraullic lines. Gama Goat is a modern vehicle and there are plenty pictures that I can use as a guide. I have two great sets of walkaround photos. I'll use them as reference. Adding such things, in my view, adds great in-depth look to a model. Also makes it much more personal and one of a kind. That is my goal. To make it look personal. And more detailed of course.
Some pictures:
Boxart...
...and a little look on the sprues.
We start with hull...
...and suspension.
Front and rear.
When attaching it to hull, be careful and note correct direction.
Next step: tractor rear panel.
In place.
There. That is it for now. So far it is typical Tamiya. Everything fits very well. Really easy.
Thanks for watching,
D.
poniedziałek, 23 października 2017
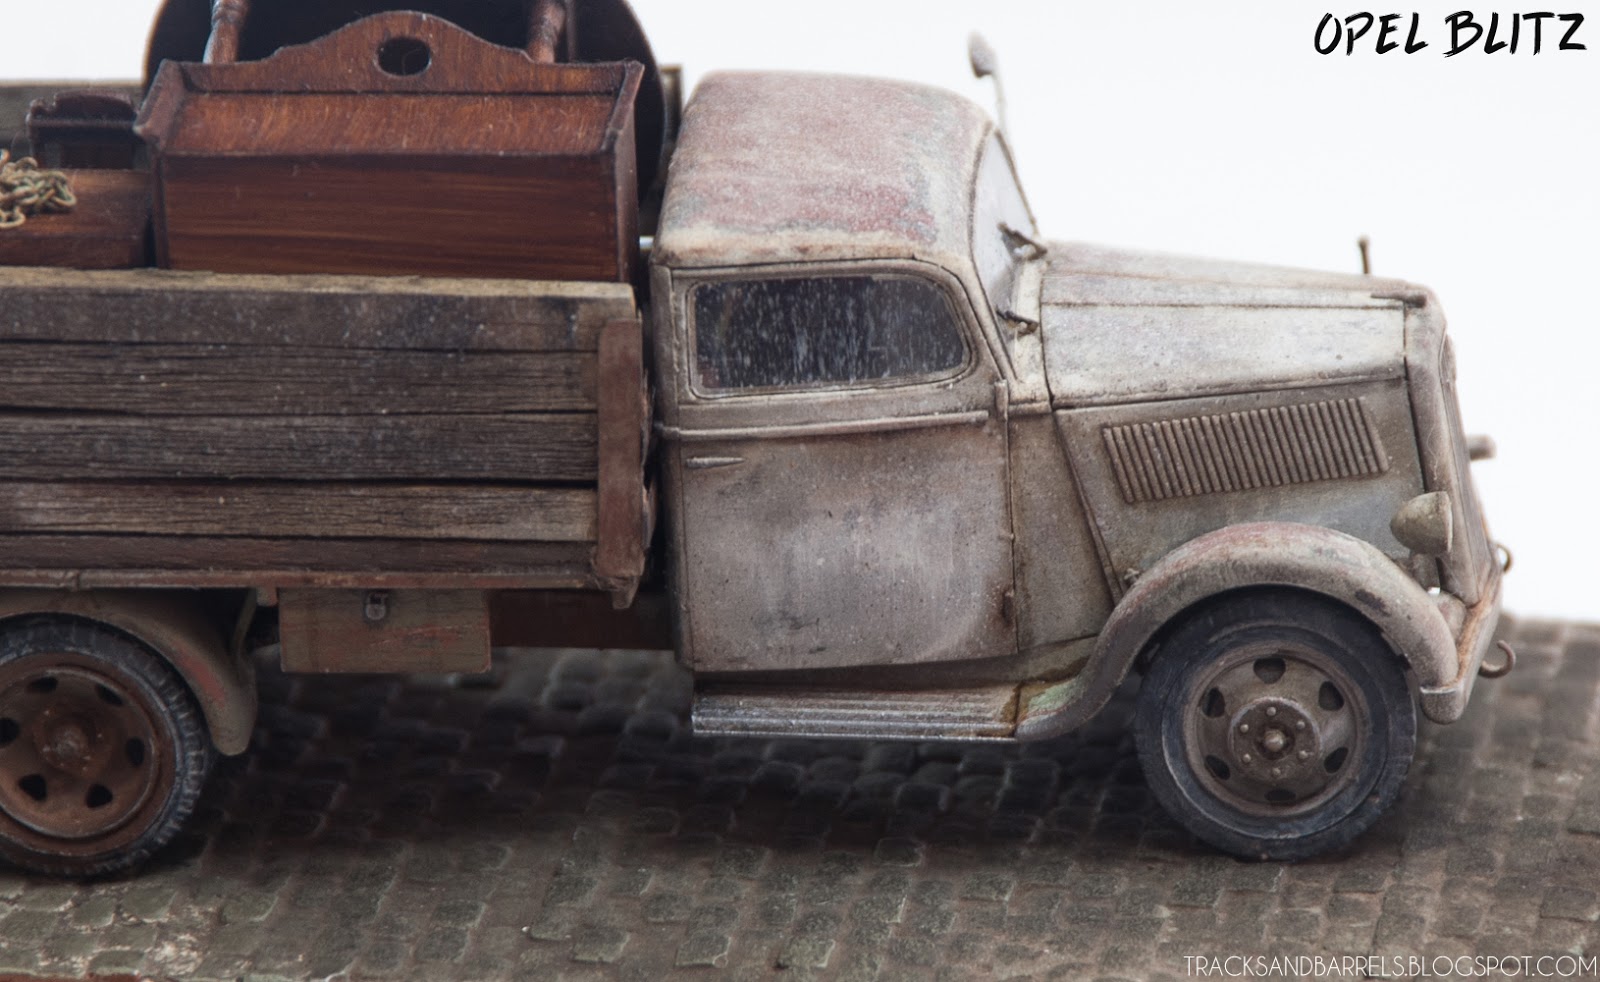
Opel Blitz 2,5-32, 1/35, ICM 35402. Final Gallery
Hi folks.
This is it. The final gallery of my Opel Blitz, type 2,5-32 from ICM.
As I've mentioned in the first part, I changed my way of modelling, in terms of weathering. I tried to focus on one small area and make whole weathering steps on that area, then move to another. I am happy with the results, as I've got a nice model with different kinds of different weathering steps density. That helps the model to look more random. One more thing - in each model I try some new thing. This time it was WOOD structures.
Well, I'll leave it for you to judge.
czwartek, 31 sierpnia 2017
Opel Blitz 2,5-32, 1/35, ICM 35402. PART 5
Hi.
Summer's over. It was invigorating, so I can get back to project. Here's some pictures.
Finally moved to painting loading of a truck - the furniture.
First, it was a coat of Old Wood acrylic paint.
Then I dilluded some brown artistic oil paint.
I've put a nice, thick coat of it with a brush.
And then, with really sharp brush I did those wood grain. It was really easy.
With furniture being done I moved to another important bit: base.
First, a coat of gray. I used two or three shades. Then I did the wash. Afrika Korps Wash from AK. I didn't shake the bottle to well and I used lots of pigments from the bottom of it.
After few minutes I sprinkled some dry pigments. Grey tones, browns. After two minutes I wiped everything with paper towel. I love the effect. Really do. Some of the stones are polished, some are soaked in wash, others are covered with pigments, which sits great in space between the stones. Really realistic finish.
Then I decided to break the finish of the back of the truck with some colour accents...
...and I have finished with the furniture.
Time to move to the sides of the back of the truck.
I painted one of the side White which was peeled of with tape.
Also put some more pigments in the middle...
Other side panel remained "woody".
That is it for now. Looks like I'm closer to final looks... :)
Thanks for watching.
Dawid
Summer's over. It was invigorating, so I can get back to project. Here's some pictures.
Finally moved to painting loading of a truck - the furniture.
First, it was a coat of Old Wood acrylic paint.
Then I dilluded some brown artistic oil paint.
I've put a nice, thick coat of it with a brush.
And then, with really sharp brush I did those wood grain. It was really easy.
With furniture being done I moved to another important bit: base.
First, a coat of gray. I used two or three shades. Then I did the wash. Afrika Korps Wash from AK. I didn't shake the bottle to well and I used lots of pigments from the bottom of it.
After few minutes I sprinkled some dry pigments. Grey tones, browns. After two minutes I wiped everything with paper towel. I love the effect. Really do. Some of the stones are polished, some are soaked in wash, others are covered with pigments, which sits great in space between the stones. Really realistic finish.
Then I decided to break the finish of the back of the truck with some colour accents...
Time to move to the sides of the back of the truck.
I painted one of the side White which was peeled of with tape.
Also put some more pigments in the middle...
Other side panel remained "woody".
That is it for now. Looks like I'm closer to final looks... :)
Thanks for watching.
Dawid
Subskrybuj:
Posty (Atom)